

A large-scale design project stays in control when each phase has a clear goal, defined scope and resources, and agreed milestones. To understand how to phase a large-scale design project, start by setting the intended outcome, then map the work in a sequence that makes progress and quality visible. The aim isn’t to add process for its own sake; it’s to give creative decisions a steady framework and make it clear what must be resolved before the next phase begins.
It’s natural to want a distinctive result without losing sight of time, priorities, or practical constraints. A professional design team can turn that ambition into a workable plan, while your input helps shape the brief, clarify preferences, and guide key decisions. This article explains how to set phase goals, define scope and resources, establish phases and milestones, and monitor progress and quality. It also outlines the information and timely feedback you can provide to keep the process clear and coordinated.
Key Takeaways
- Give each phase a clear outcome, with responsibilities and resources aligned to the work that needs to be completed.
- Sequence the project into manageable phases and milestones so decisions and deliverables have a clear place in the process.
- Define scope, priorities, constraints, and risks early to create a practical foundation for design decisions.
- Use regular progress reviews and quality checks to spot changes in direction, while timely client feedback helps keep the work aligned.
What is the main goal of the Design phase in a transformation project?
The design phase turns the intended outcome into an agreed plan for implementation. Clear roles, decision-making authority, and review points help everyone move through the plan in a coordinated way.
- Assign ownership. Name a lead designer and assign individuals or teams to each task and milestone. The lead designer coordinates analysis, design, implementation, and evaluation; collaborative work can support development. Define who prepares each deliverable, who reviews it, and who has authority to approve a change.
- Choose a visible planning method. A Gantt chart can show task sequences, milestone dates, and responsibility assignments in one view. Pair it with clear communication channels and regular team feedback, adapting the process to the project rather than treating one method as universal.
- Match resources to the work. Allocate people, time, and equipment to the relevant tasks, then revisit assignments when dependencies or priorities shift. For a responsive web app, schedule additional design time to adapt features for touch and desktop devices.
- Keep collaboration structured. Tools such as Microsoft Project, Asana, Trello, or Jira can track tasks, ownership, and schedules. The team should select a shared system that makes decisions and current work visible, not scatter updates across disconnected channels.
Align Stakeholders Through Professional User Research
Share project goals, intended occupants, functional needs, and known constraints with the design team so they can assess the context. Alignment improves when the team records findings, connects them to design decisions, and makes unresolved differences visible before approval.
For a large team, establish a clear feedback process and identify who can resolve competing priorities. Not every preference is a requirement: distinguish practical needs from individual opinions, then agree who has authority to make decisions.
Plan Professional Design Reviews, Approvals, and Handoffs
Agree on review points, approvers, and the materials each decision requires. The design team can hold larger reviews bi-weekly and work with the client weekly to decide where more attention is needed before moving to the next feature.
Record feedback and approvals against the relevant deliverable, then hand off the approved design with its decisions and outstanding dependencies. You can support a smooth handoff by consolidating comments and sharing them through the agreed channel.
How a professional design team breaks a project into phases and milestones
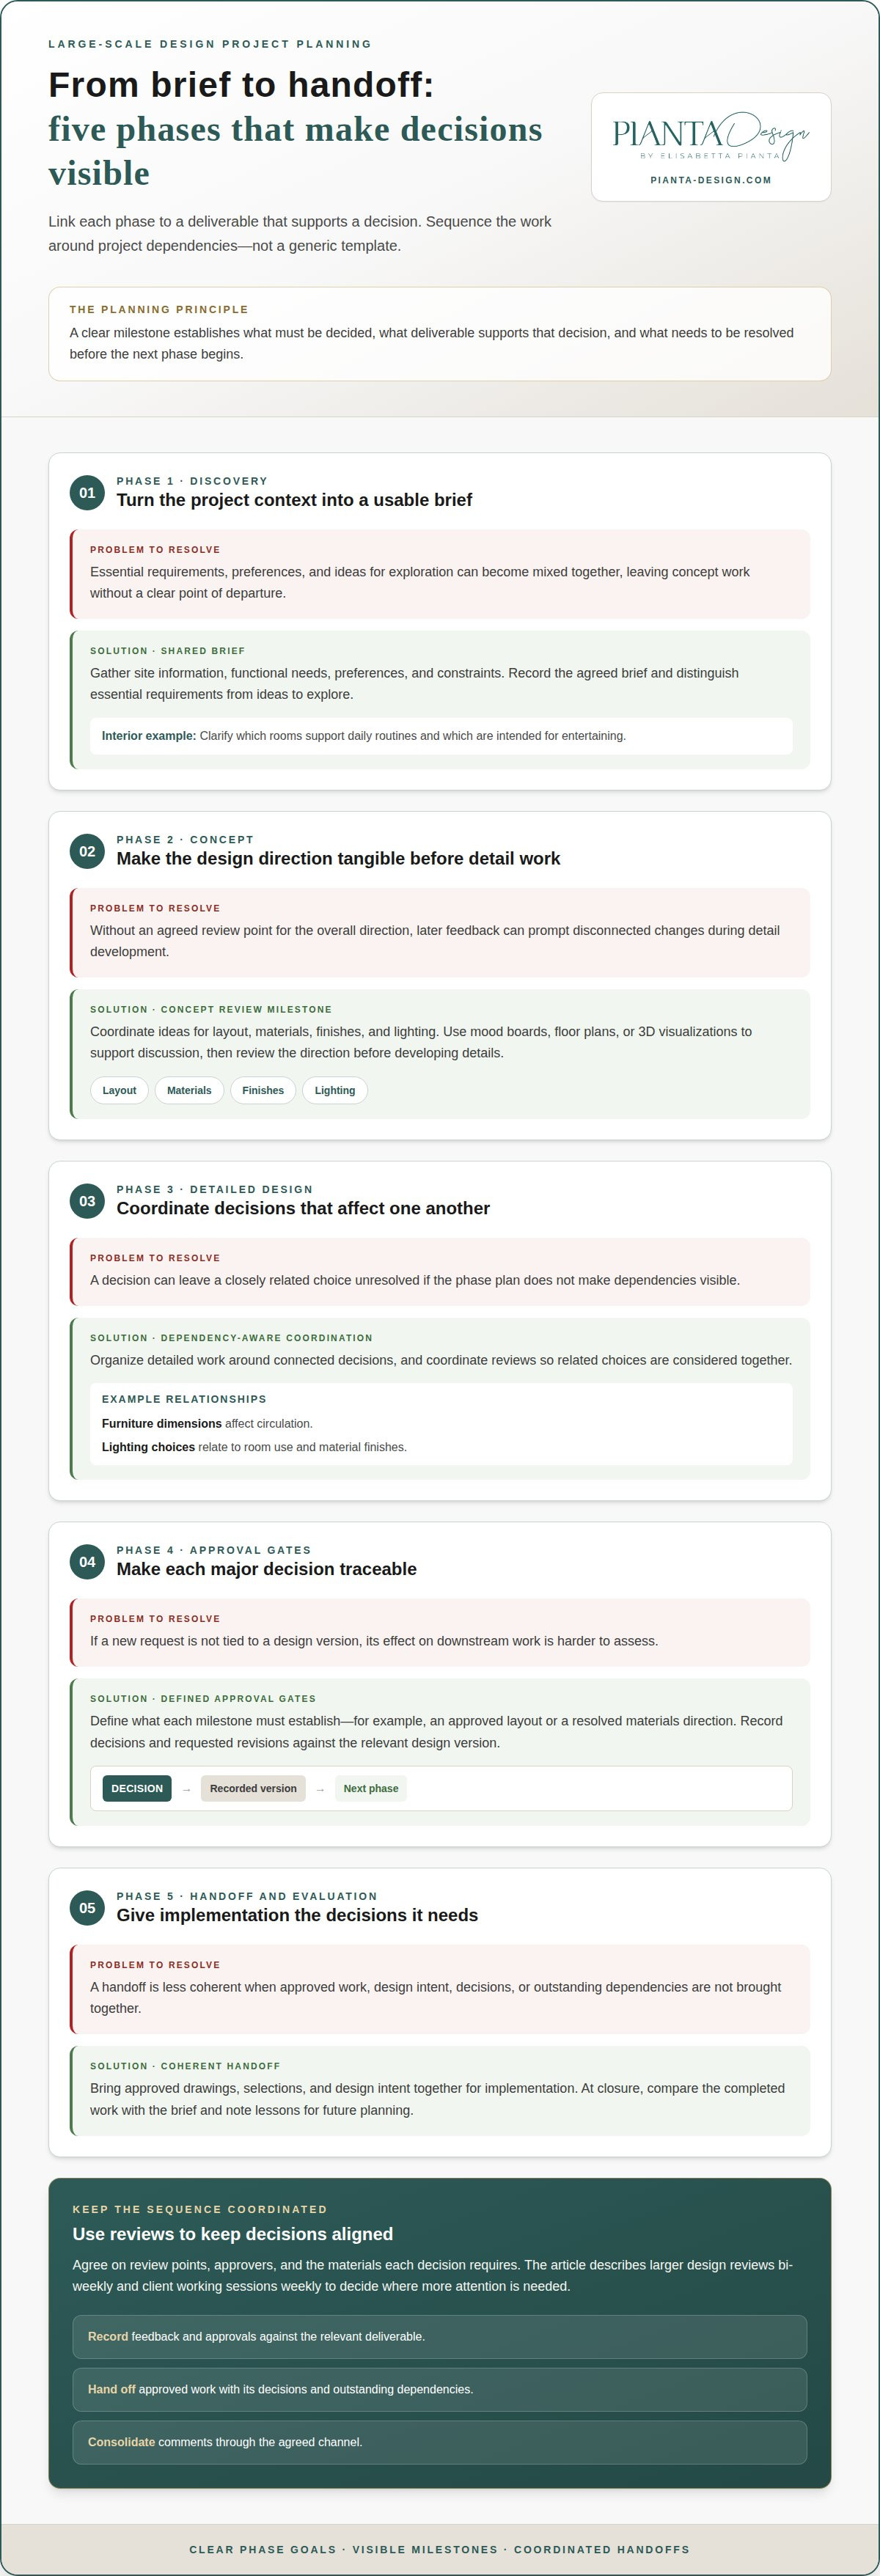
The clearest way to understand how to phase a large-scale design project is to link each phase to a deliverable that supports a decision. Sequence the work according to the project’s dependencies rather than relying on a generic template.
- Translate discovery into a usable brief. Gather site information, functional needs, preferences, and project constraints. The milestone is a shared brief that distinguishes essential requirements from ideas for exploration. For an interior, this could clarify which rooms need to support daily routines and which are intended for entertaining. That distinction gives concept work a clear point of departure.
- Build the concept around the brief. Develop the design direction through coordinated ideas for layout, materials, finishes, and lighting. Use mood boards, floor plans, or 3D visualizations to make the concept tangible for discussion. Set a review milestone before detail development, so feedback can shape the overall direction rather than prompting disconnected changes later.
- Develop interdependent decisions together. Organize detailed design work around dependencies. For example, furniture dimensions can affect circulation, while lighting choices relate to both room use and material finishes. The team should identify those connections in the phase plan, then coordinate reviews so that one approval does not leave a closely related decision unresolved.
- Set approval gates for major deliverables. Define what each milestone needs to establish, such as an approved layout or a resolved materials direction. Record decisions and requested revisions against the relevant design version. This gives the team a reliable reference point and makes the effect of a new request easier to assess before it changes downstream work.
- Prepare a coherent handoff and evaluate the result. Bring approved drawings, selections, and design intent together for the implementation stage. At closure, compare the completed work with the brief and note lessons for future planning. A useful way to approach how to phase a large-scale design project is to ensure each handoff gives the next stage the decisions it needs.
How a professional design team defines project scope, objectives, resources, constraints, and risks
The team turns the brief into measurable objectives, a defined scope, and a resource plan. Four steps make assumptions and trade-offs visible before design work advances.
-
Define Scope and Objectives with a Professional Design Team
Share the intended outcome, priorities, and relevant project information with the design team. They can translate these into specific, measurable, achievable, relevant, and time-bound objectives, then document the spaces and deliverables included in the scope, along with decision boundaries. For example, clarify whether a room plan covers concept development only or also detailed material and finish selections. Separate essential requirements from preferences to keep the scope focused.
-
Estimate Budgets and Costs with a Professional Design Team
Ask the team to connect its estimate to the agreed scope, rather than treating a preliminary figure as a fixed project cost. The estimate depends on the extent of the design work, the number and complexity of spaces, custom elements, material choices, and time required. Allocate part of the overall budget to each sub-project and use those allocations to guide decisions. If the scope changes, resources may need to be reallocated.
-
Allocate Resources and Identify Constraints with a Professional Design Team
Provide the team with priorities, known deadlines, access requirements, and relevant functional needs. They can map personnel, equipment, budget, and time to each phase and milestone, then identify constraints that affect the sequence. For example, a space that must remain in use during design may require decisions to account for its day-to-day needs. Record dependencies so the effect of a delayed decision on later work is clear.
-
Identify Project Risks with a Professional Design Team
Ask the team to document risks, their possible effects, early warning signs, and planned responses. Risks may include delayed decisions, changing requirements, or an unavailable preferred material. A contingency plan can identify alternative selections or tasks that can be resequenced while preserving the project’s core objectives. Review the risk register as the scope and conditions evolve, and document agreed changes before they affect dependent deliverables.
How a professional design team monitors progress and controls quality
Use agreed milestones to compare completed work with the plan. Each review should bring forward decisions, quality concerns, and changes that could affect upcoming tasks.
- Track progress against deliverables. The project manager updates task status, dependencies, and milestone completion in a shared schedule. Microsoft Project, Asana, Trello, or Jira can organize this information. Review the schedule continuously, noting which decisions or outstanding inputs could affect later work.
- Review quality against the brief. Compare each design deliverable with the approved objectives, requirements, and scope. Check that drawings, material selections, and visual presentations remain coherent with one another. Record specific discrepancies and assign responsibility for resolving them before the next approval point.
- Set a clear review rhythm. Larger design reviews can take place bi-weekly, with focused working sessions between them. A weekly discussion with the client can establish where the team should spend more time before advancing to the next feature or deliverable. Share an agenda and record decisions so feedback has a clear route into the work.
- Manage changes deliberately. Revisit project scope and goals as work develops, and document any proposed adjustment before changing the plan. Assess how it affects dependent tasks, available resources, quality criteria, and milestone timing. This makes trade-offs explicit instead of allowing small revisions to accumulate unnoticed.
- Close each phase with a quality check. Confirm that required deliverables are complete, feedback has been addressed, and approvals are recorded. If a review reveals a gap, assign corrective work and update the schedule before handoff. At project close, compare results with the initial objectives and capture lessons that can improve future processes.
Discuss project progress and quality reviews as part of a considered design process.
Pianta Design
For a substantial interior project, Pianta Design helps bring creative direction and practical requirements into a coherent design plan. Residential Interior Design, Commercial Interior Design, and Yacht Interior Design each call for decisions shaped by the space and its intended use. Custom Furniture Design can also be integrated where a tailored piece supports the overall composition. Clear client priorities help the team develop a considered direction and present design work for approval.
If you’re preparing a large-scale interior project, contact Pianta Design to discuss your goals and the design process.
Shape the Next Design Decision
Knowing how to phase a large-scale design project gives you a useful starting point, but the plan should also reflect the space and how you want to experience it. The next step is to turn your priorities into a design direction that can guide decisions as the project develops. Consider what matters most in the finished interior, from atmosphere and function to the details that make it feel personal.
Pianta Design can help translate that direction into a considered interior design process, whether your project is residential or commercial. A clear conversation about your aspirations, practical needs, and preferred aesthetic gives the team a foundation for shaping the work around your space.
Contact Pianta Design about your project to begin shaping an interior with clarity and intention.
Frequently Asked Questions
What are the typical phases of a large-scale design project?
A large-scale design project typically moves through discovery, concept development, design development, documentation, implementation coordination, and evaluation. The sequence can vary with the project: a residence requiring custom furniture, for example, needs furniture decisions coordinated with room layouts and material selections. Each phase should produce the information needed for the next, making unresolved choices visible before they affect later work.
How does a professional design team define scope, goals, and success metrics for a large design project, and what input should clients provide?
The team defines scope by translating the desired outcome into agreed deliverables, boundaries, and measures of success. You can provide plans, reference images, functional priorities, and details about how you use the space. For example, if you need a quiet work area, identify privacy and storage as priorities. The team can then assess whether the proposed layouts support those needs.
What roles and team structure are needed for a large-scale design project?
A large project needs a lead designer to coordinate the design direction and specialists for relevant disciplines, such as space planning, lighting, or custom furniture. The team structure follows the project’s scope. For example, a project with bespoke furnishings needs clear coordination between the furniture designer and the designer responsible for the surrounding space. Named decision-makers also help resolve conflicting feedback.
How long does each phase of a large design project typically take?
Phase duration depends on scope, complexity, approval pace, and the number of interdependent decisions. A concept phase may move efficiently when priorities are aligned, while detailed development can take longer if custom pieces or material selections need further consideration. The team builds the schedule around deliverables and dependencies, then adjusts it when approvals or project requirements change. No single timeline fits every project.
What risks commonly derail large design projects, and how can they be mitigated?
Unclear priorities, delayed decisions, changing requirements, and conflicts between design elements can disrupt a project. The team can limit their impact by recording decisions, tracking dependencies, and reviewing changes before they affect approved work. For example, changing a room layout may influence furniture dimensions, lighting placement, and material quantities. Assessing these connections early helps identify affected deliverables and plan a considered response.
