
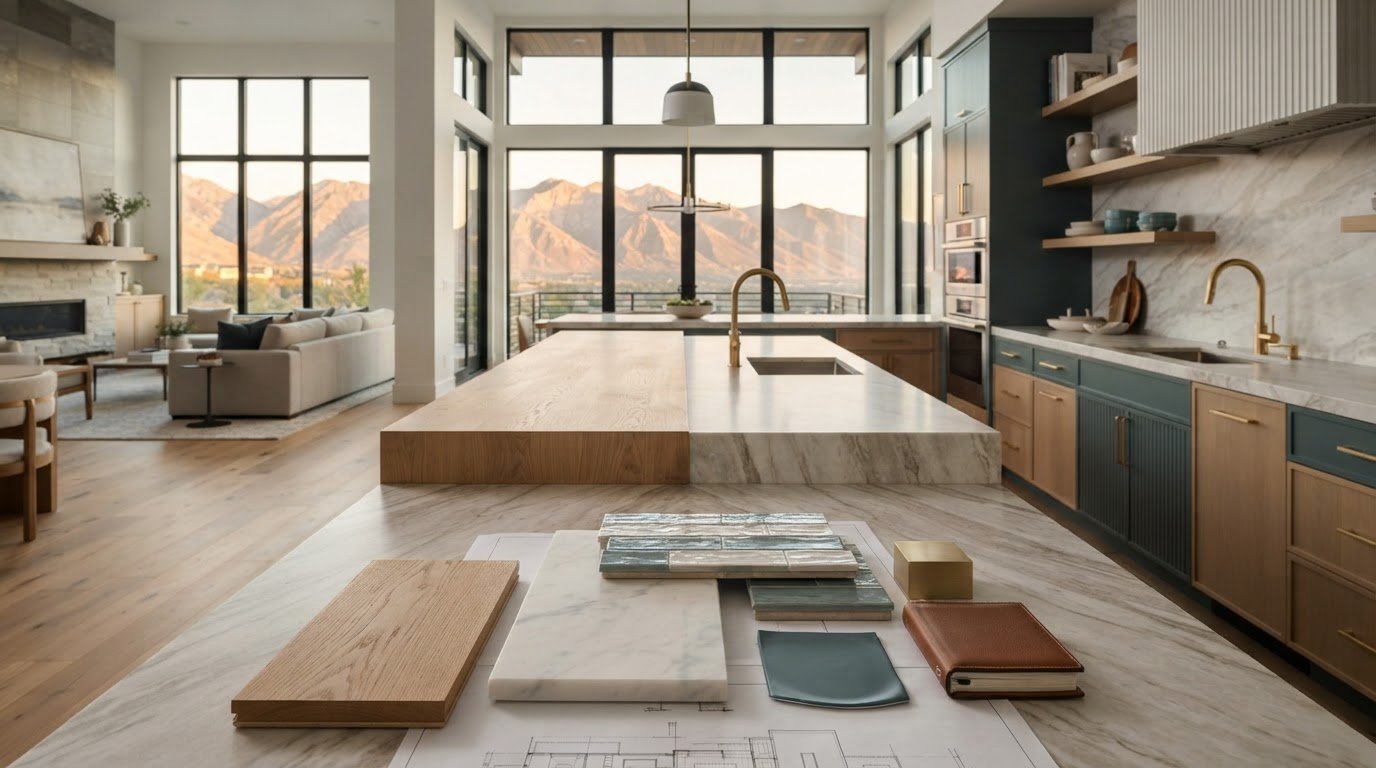
A builder can guide finish selections, but that doesn’t automatically make a designer’s perspective unnecessary. Selecting finishes for a new construction home is easier when each person’s role is clear: your builder can explain quality, cost, lead times, and construction requirements, while a designer can shape a cohesive palette around your vision. Showroom staff can help you compare materials and durability.
It’s natural to wonder whether your builder can handle every choice. Builders offer valuable practical guidance, especially on construction dependencies and decision deadlines. Coordinating all the finishes into a home that feels considered and personal, however, is a different task.
This guide explains how to prioritize selections, which decisions may affect the construction schedule, and what to finalize before the walls close. You’ll also learn when a designer or showroom consultant can help, so the finished home balances beauty, function, and everyday living.
Key Takeaways
- Choose exterior materials, cabinetry, flooring, and countertops before smaller details to create a coordinated palette that’s easier to refine.
- Prioritize selections with long lead times, and align decisions with construction dependencies and your builder’s deadlines to help keep the project moving.
- Finalize tile, grout, fireplace surrounds, trim, stairs, and specialty millwork before drywall closes, when changes become more difficult.
- Use your builder for construction and schedule guidance, a designer to develop a cohesive vision, and showroom staff to compare materials and durability.
How many selections does a custom home require?
There’s no fixed number; plans and builder options determine the schedule. Begin with major materials, then coordinate the details.
-
Identify Core Finish Categories
List the exterior cladding, roofing, cabinetry, flooring, countertops, paint, hardware, and interior finishes. A builder’s included package may cover basic options in these categories, but the specific selections depend on the available options.
Choose exterior materials, cabinetry, flooring, and countertops first; they establish the palette for smaller finishes. Limit exterior cladding to three materials and use 3-5 core colors to help maintain visual harmony.
-
Compare Materials and Coordinate Surfaces
Compare countertop and flooring materials for appearance, maintenance, and daily use. Hardwood, luxury vinyl tile, and tile can suit high-traffic areas. If you often drink coffee or red wine, a stain-resistant quartz surface may suit your needs better than white marble.
Coordinate bathroom tile with the countertop without matching every surface exactly. Carrying countertop stone up the backsplash can create a continuous finish. Schedule templating after the cabinetry is installed, so measurements can be taken from the finished cabinets.
-
Evaluate Included and Upgraded Finishes
Compare each included option with an upgrade, considering material, finish, and care needs. Builder-grade finishes aren’t automatically less durable; performance depends on the product and how it’s used. Prioritize upgrades to high-use surfaces or cabinet hardware when their quality and appearance better suit your needs.
Paint and light fixtures are easier to change later than installed cabinetry or flooring. Builder warranties are governed by their written coverage and exclusions. Local building codes set applicable construction requirements, not personal style.
-
Review Builder Options and Allowances
Compare each builder’s finish options and allowance terms, since selections and pricing vary by location, suppliers, and project scope. Upgrade costs depend on the material, quantity, installation, and allowance. Request a quote to establish the price.
Before signing, review what each allowance covers, how substitutions and overages are handled, and when choices are due. Confirm the included finish schedule, approval process, warranty terms, and applicable code requirements in the written selection contract.
What selections affect construction timeline the most?
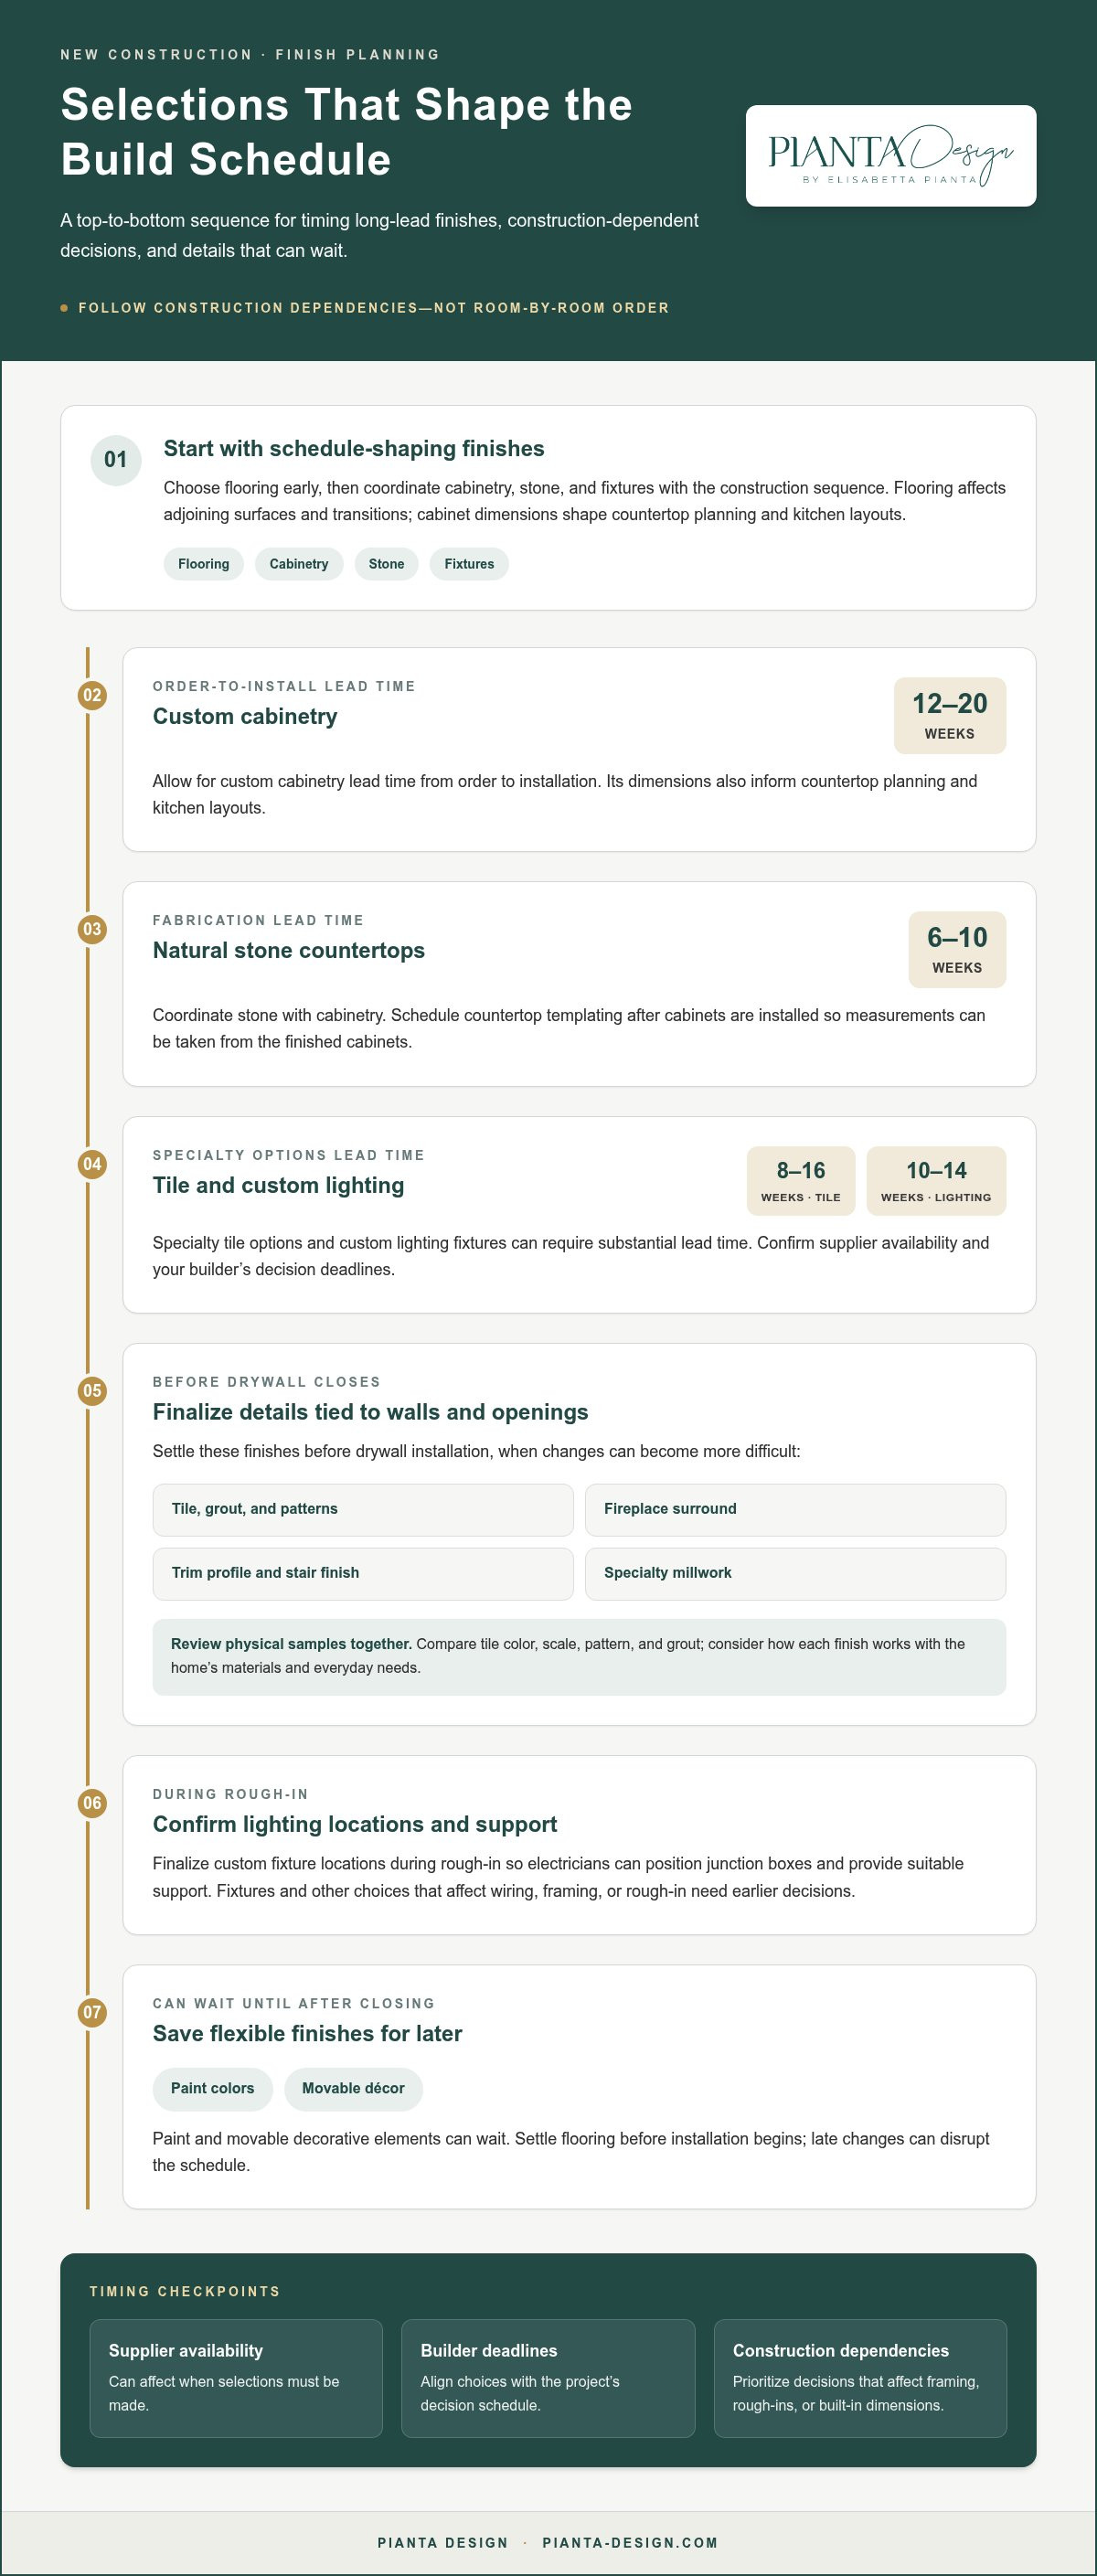
Choose flooring, cabinetry, stone, and lighting early because their installation requirements and lead times shape later work. Paint and movable decorative elements can wait until after closing; decisions that affect framing, rough-ins, or built-in dimensions cannot.
-
Choose Pre-Construction Finishes
Finalize flooring early, then coordinate cabinetry, stone, and fixtures with the construction sequence. Flooring affects adjoining surfaces and transitions, while cabinet dimensions shape countertop planning and kitchen layouts.
Allow for custom cabinetry lead times of 12-20 weeks from order to installation. Natural stone countertops typically require 6-10 weeks for fabrication, and specialty tile options can take 8-16 weeks.
Custom lighting fixtures typically require 10-14 weeks. Finalize their locations during rough-in, so electricians can position junction boxes and provide suitable support. Confirm supplier availability and your builder’s decision deadlines; both affect when selections must be made.
-
Plan Flooring and Selection Timing
Choose flooring with adjoining rooms in mind, especially in an open-concept layout. Using fewer flooring types means fewer transitions, which can simplify cleaning and reduce barriers for people with accessibility needs. Hardwood, luxury vinyl plank, or tile can work well in high-traffic areas.
If you want a look that feels less likely to date, consider wood or luxury vinyl plank instead of wood-look tile. In areas more susceptible to water damage, such as mudrooms, basements, and laundry rooms, consider materials suited to those conditions. Settle flooring before installation begins, since late changes can disrupt the schedule.
Save paint colors and movable décor for after closing; select fixtures and other elements that affect wiring, framing, or rough-in earlier. For a cohesive plan across architectural details and surfaces, material and finish selection can bring those decisions into alignment.
Kitchen and bathroom finishes may require substantial lead time and preparation, affecting completion timelines and budgets. Prioritize the most expensive or constrained hard finish, then follow construction dependencies rather than making selections room by room.
Pre-drywall tile, grout, fireplace, trim, and stair selections
Before drywall installation, settle finishes that depend on wall openings, framing, or detailed measurements. Review physical samples together to see how each choice works with the home’s materials and your daily needs.
-
Select Tile, Grout, and Patterns
Choose tile and grout for each bathroom, then compare their color, scale, and pattern using physical samples.
For bathroom floors, simple patterns may be easier to navigate for people with vision loss than intricate ones. Choose contrasting white tiles rather than trying to match whites exactly. Check how grout changes the overall pattern, and consider whether the finished surface suits the room’s use.
-
Choose Fireplace, Trim, and Stair Finishes
Finalize the fireplace surround, trim profile, stair finish, and specialty millwork before drywall closes. These elements meet walls, floors, and openings, so changes can be more difficult once those surfaces are covered. Compare samples beside the flooring and cabinetry references you’ve chosen.
Assess how each area is used before prioritizing appearance. Choose stair and trim finishes that relate to nearby flooring, then compare the fireplace material with the room’s broader palette. Gather inspiration images, but use actual samples to judge color and texture in the home. Record every selection clearly, including grout color, trim profile, and finish, so the construction team can follow a consistent plan.
One option to review is a faux-marble bathroom tile measuring 12 x 24. Consider it alongside the other bathroom samples, looking at its color and pattern in the context of the finishes already selected. Physical samples can help clarify how the tile works with the room’s palette, rather than relying on an image alone.
For bathroom finishes, choose contrasting white tiles rather than trying to match whites exactly. Also consider how you use each space and whether materials suit your lifestyle before prioritizing appearance. This practical check can guide your tile, grout, fireplace, trim, and stair selections toward finishes that work for daily use and keep the overall palette consistent.
Consulting contractors, designers, and showroom staff
To avoid finish-selection mistakes and upgrade overages, compare written specifications, allowances, and samples before approving each choice. Clarify each role: your builder explains construction constraints, a designer coordinates the vision, and showroom staff help you understand material options.
- Ask your builder about product quality, cost, lead times, and decision deadlines. For example, confirm whether the kitchen cabinet allowance covers the door style and hardware you want or only a standard specification. Record the answer alongside each selection to keep budget and schedule decisions visible.
- Give a designer a mood board with reference images, preferred colors, and notes about how you use each space. A designer can bring finishes into a coherent palette, helping you see how cabinets, counters, flooring, and lighting influence one another across connected rooms. This is especially useful when an open kitchen shares sightlines with a living area.
- Bring shortlisted samples to showroom staff and compare their material, texture, care needs, and durability. Place a cabinet finish beside countertop and flooring samples rather than judging each surface on its own. Digital images can differ from physical materials because of lighting and screen settings, so view samples in the home’s natural and artificial light.
- Before approving an upgrade, compare its written specification with the included option. Note the material, finish, quantity, installation scope, allowance terms, and any deadline. Ask the builder to document the selected option and added cost before approval, then keep the signed record with your finish schedule. This gives you a practical reference when decisions or invoices arise later.
- Use each professional for the decisions they can clarify, then bring those perspectives together before final approval. Develop a coordinated finish plan to align materials, colors, and details across your home.
Pianta Design: Residential Interior Design
Pianta Design’s Residential Interior Design service can bring finish decisions together, especially when flooring, cabinetry, lighting, and architectural details need to feel cohesive. Work with a designer when you want guidance shaping a personal vision, comparing materials, or balancing your aesthetic preferences with how each room will be used.
Through mood boards, floor plans, and 3D visualizations, Pianta Design helps translate ideas into a considered direction for client approval. This can clarify how finishes relate across connected spaces before individual choices become a complete interior. The result is a more intentional framework for making decisions alongside your builder and showroom team.
Contact Pianta Design to discuss Residential Interior Design for your new home.
Shape a home that feels distinctly yours
The next step is to turn individual preferences into a clear design direction that reflects how you want to live, rather than simply following trends. Thoughtful choices when selecting finishes for a new construction home can create continuity across everyday spaces while leaving room for personal details that make the interior unmistakably yours.
Pianta Design offers Residential Interior Design for homeowners shaping a new home, alongside Commercial Interior Design and Custom Furniture Design for projects with different needs. When you’re ready to explore how your ideas might come together, contact Pianta Design to discuss your project.
Let each considered choice bring you closer to a harmonious, personal home that’s ready for the life you envision.
Frequently Asked Questions
Can my builder handle selections without a designer?
Yes. A builder can guide you through available options and explain construction requirements, while a designer can coordinate your preferences into a cohesive vision. If you know what you like and feel comfortable comparing materials, your builder may provide enough guidance. If you’re unsure how colors, textures, and furnishings will work together, design support can help establish a direction before individual choices accumulate.
When should I start making selections for my new construction home?
Begin selecting finishes for a new construction home once you have the plans and understand the builder’s decision schedule. You can start sooner by collecting inspiration and noting preferences, such as warm or cool tones, without committing to specific products. Refine those ideas as room dimensions and design details take shape. This preparation helps you make confident choices when the builder needs final specifications.
When do buyers need to select finishes during the construction process?
Buyers select finishes in stages, according to the build sequence and the builder’s deadlines. Begin selecting finishes for a new construction home when choices could affect layouts, electrical locations, or built-in dimensions. Other decisions, such as paint colors or movable décor, may suit a later stage. Request a selection calendar and sort decisions by when each choice affects the work, so priorities stay clear.
